Last updated on March 14th, 2022
Our site is reader supported, this means we may earn a small commission from Amazon and other affiliates when you buy through links on our site.
Rubber trees are wonderful houseplants and if you already have a successful rubber plant or know someone who does, there’s no reason you shouldn’t be able to collect two or three more. Propagating can seem intimidating at first, however, you shouldn’t shy away from it until you’ve tried it and it’s actually good fun. With rubber plants, there are two main ways that you can propagate. The first is by taking cuttings, similar to how you would propagate most other plants, and the second is by using a process known as air layering, which is also very simple.
Propagating With Cuttings

Step 1
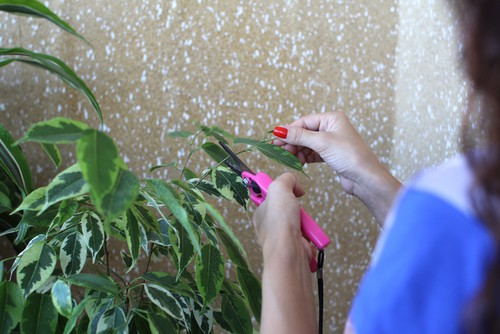
Rubber trees can get very tall, even if you grow them inside, so most people will need to prune them once a year, and usually choose June as the month for pruning. Occasionally pruning an indoor plant helps to keep them at the appropriate size. Plus the cuttings you take when you prune can be effectively used to propagate. Whether you are pruning or you are simply choosing to take a cutting in isolation, you want to take cuttings that are approximately 15cm in length and have at least two sets of leaves. If you are pruning you can take the branches you have pruned and take cuttings from them.
Step 2
From there you want to remove any of the bottom sets of leaves. There should still be one set of leaves on top.
Step 3
You can choose to use a rooting hormone to help the cutting establish itself more effectively and if you do, simply dip the opposite end in the rooting hormone before you place it in a container. Using a rooting hormone will help increase results, although we find it’s often successful without.

Step 4
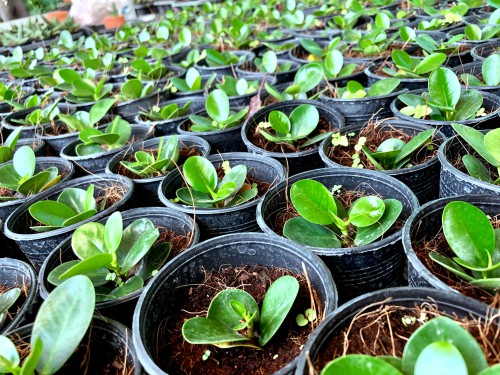
When you are ready, take containers (filled with well-draining potting compost) and put the cutting inside. It is most effective for you to water the potting soil until it is thoroughly moistened from one end to the other and then create a hole with a pen or pencil into which the cutting can be placed.
Step 5
Once you have planted your cuttings into small pots it’s important to cover them with something like a clear piece of plastic or a glass jar. Whatever you use, you have to be sure that the leaves do not touch any of the material you’ve used for the cover, and if you are using a clear plastic bag we recommend placing some small flower sticks around the pot.
If you want to get serious about taking cuttings or growing plants from seedlings, there are propagators designed with detachable lids and controls on top for airflow that can be used. Other people choose to stick flower sticks at either end of the pot and then put a Ziploc type bag or other plastic bags over the flower sticks to create a sort of tent. Regardless of the method and materials you use, the intent is to effectively create a tiny greenhouse for each cutting to help retain moisture.
Place the entire cutting somewhere warm where it gets indirect light only. After about three weeks the root system should have developed enough that the covering can be removed and the cutting left to grow on if already in its own small pot, or transplanted into a new pot for growing on.
Propagating Rubber Plants by Air Layering

Step 1
You can also use a process known as air layering which effectively leaves your cutting on the original plant while it generates a new rooting system. In order to do this, you need to choose a stem that will serve as your new plant. This stem needs to be at least 20-30cm in length.
Step 2
After you have selected the stem you should remove any leaves immediately above and below where you want the rooting to take place. With a sharp knife that has been properly sanitised, you can carefully remove a 3cm wide strip of bark all the way around the stem. The end result should be a naked ring of the exposed stem that travels all the way around the piece you have selected. All of the soft tissue should be removed from the said ring, leaving nothing but the hard centre wood because this is where the new roots will come from.
Step 3
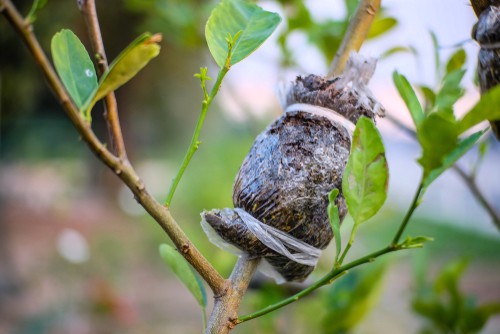
Take rooting hormone and dust the exposed ring, after which you need to cover the ring with damp moss. This sphagnum moss should be secured to the stem by way of a plastic covering, cling film seems to work well and most people have access to it. The moss needs to be completely covered similarly to a greenhouse effect so that it remains damp. After approximately three weeks the stem should develop roots around that exposed ring and once it has you can cut the rooted stem from the original plant and repot it.
That’s it, have fun and let us know how you’re cuttings come on!
Image credits – Shutterstock.com


