Last updated on March 27th, 2022
Our site is reader supported, this means we may earn a small commission from Amazon and other affiliates when you buy through links on our site.
Growing from seed isn’t significantly different than growing from cuttings, but there are some key steps for ensuring your propagation goes well. There are over 2,000 types of rockery plants so you want to be mindful of the variety you have chosen so that you have a good idea of how long it will take to germinate, when you should transplant it and what specific growing conditions it requires. But the beginning steps for propagating alpines from seeds are the same no matter what variety you have.
Step 1: Buy quality seeds
 Mixed rockery seeds – Check availability on Amazon.co.uk
Buy seeds from a reputable supplier, if the seeds are of poor quality you will struggle to germinate the seeds
The seeds you buy will make a big difference. High-quality seeds that are freshly taken from existing rockery plants are your best option. Don’t buy the cheapest seeds you can find, but rather visit a nursery and talk to them about which seeds they would recommend. If you buy online, check out reviews to see what other buyers have to say about the seeds. Just do your homework and buy from a reputable supplier.
Step 2: Get the right supplies
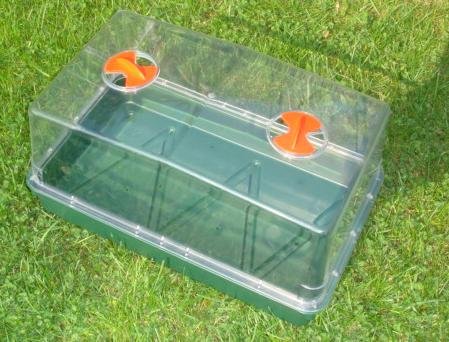 Seed trays are ideal for propagating rockery seeds – Check availability on Amazon.co.uk
Ideally, use seed trays and cover with clear polythene or invest in a propagator
You will need the right containers and seed trays are what most people go to. But if you are planning to propagate on a regular basis , you can purchase propagators, this makes a wise investment and can speed up germination. These containers have everything you need and they come with a base in which the soil and seeds are placed and a lid that secures on top with features that allow you to adjust the amount of airflow.
If you want to do things a little cheaper and you are just trying propagation out for the first time, you can always use cups or containers and place the plastic over them, or invest in some seed trays and cover with clear plastic.
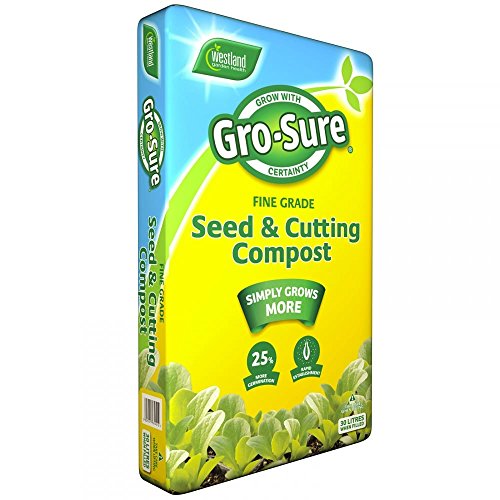
Invest in good quality seed compost
Soil is equally important. You need a soil specifically for alpines otherwise your project won’t produce the results you desire, look for compost sold for growing seeds. We recommend mixing 30% grit sand to ensure it’s free draining.
Step 3: Plant the seeds
Carefully spread the seeds over the surface of the soil and don’t bury them
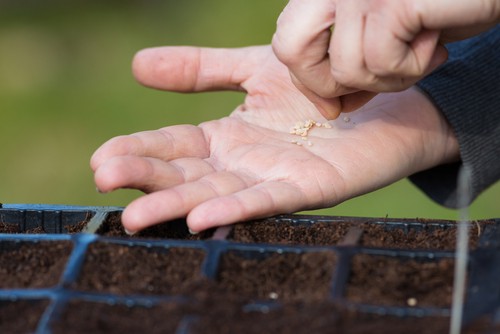
Alpine seeds are incredibly small and susceptible to disease so you should clean and sanitise all of the tools you are using, including the trays and your hands as well as the workspace you are using. Once everything is wiped down, fill the trays with compost. Then open your seed packet, you want to carefully remove the seeds and place them on top of the soil.
As they are so small it might be difficult for you to see where you put them and you can always use things like tweezers or a toothpick that have been sanitised to pick up individual seeds if you are having trouble getting them with your fingers. Space the seeds so they have plenty of room between them, this will make transplanting them much easier later on.
Step 4: Caring for the seeds
Water carefully being careful not to overwater, soak from the bottom or water with a fine watering can rose
Now that they are planted you need to give them time to germinate. They will need access to water and this is best done by flooding the bottom of the tray or by watering with a light sprinkle using a fine watering can. Wait until the water has been absorbed all the way through the top of the soil. If it doesn’t reach all the way to the top you can always add more.
Cover seeds with a clear lid of polythene
At this time you want to put the lids on your trays if you have opted for using a propagator to help reduce evaporation. You will need to check the container daily just to make sure the soil is damp. Alpines don’t need a lot of water once they are mature because their leaves hold water. However, before they have developed those leaves you need to give them a little extra help. If you just have seed trays or pots, place a clear piece of polythene over the seed tray or pots and turn daily in the morning.
Place seed trays in a well-lit room but not in direct sunlight
Also, make sure that you place the trays near a bright window. You don’t want them to get burned from direct sunlight, but they should be in a well-lit room where the temperature remains warm.
The germination time is going to vary based on the variety you have chosen. So make sure you read the instructions for the variety you have so that you know when to expect your plant to appear. Once sprouts appear, give the plant lots of airflow, and keep your eye on watering. If you are using a lid, now is the time to remove it.
Finally, once they are a little established prick them out into individual containers in alpine compost and grow on in a warm room before planting them out in spring when the risk of frost has passed, usually around the end of May.

