Last updated on April 22nd, 2022
Our site is reader supported, this means we may earn a small commission from Amazon and other affiliates when you buy through links on our site.
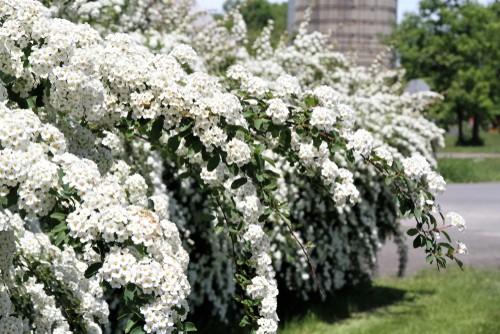
Spiraea bushes are beautiful upright shrubs that grow in a mound and have graceful, overhanging branches where you will find the beautiful clusters of small white flowers that literally take over the entire branch. These large shrubs can reach between 1 and 2 metres tall once fully established.
Very easy to care for, they not only bring you stunning flowers for which they are well known but deep, blue-green leaves that remain stunning in their aesthetic all throughout the summer, long after the flowers have finished.
If you have a Spiraea bush in your garden and you want to add more, there are many ways that you can propagate it. Propagation shouldn’t scare you because it’s a very easy way to multiply the plants you have without having to go back to your local nursery or garden centre. It is actually a fairly easy and enjoyable process. In fact, once you have a successful Spiraea bush in your garden, that is going to be the most successful place to get a cutting from because you already know that it can thrive in your garden.
Propagating Spiraea bushes
There are three methods you can use to propagate Spiraea bushes:
- Softwood cuttings
- Hardwood cuttings
- Ground layering
Top Tip:
With any of these methods, you need to ensure the cutting you take is one that is sterile. To do this, wipe your gardening scissors or tools clean before each cutting you take. If you are taking multiple cuttings, it is good to keep one-time use alcohol wipes to hand so that you can wipe down the blades in between each cut. Alternatively, you can clean them with household full-strength cleaners, rubbing alcohol, white vinegar and water, or bleach and water.

Softwood cuttings
When to take them
If you opt for softwood cuttings, you should take them between the middle and the end of summer.
How to propagate
- For this method, take each cutting that is about 30cm in length. You want something that is flexible enough to bend generously without snapping.
- Trim the top 15cm from the tip of the stem and remove any leaves below this point.
- Take the ends and dip them into the rooting hormone to aid with root development. Shake off any excess powder.
- Fill containers with the potting mixture, using pots that have adequate drainage and mist the mixture to moisten it before you plant.
- Place around 4 or 5 cuttings along the inner edge of the pot and then cover it with a plastic top or bag, seal it to create the greenhouse effect, and place it in a location with dappled shade outdoors.
- Check on the plants weekly to ensure they are properly watered.
- Rooting should take place in about 4 weeks, with new foliage at the same time.
- Once they have sprouted, you can repot them into individual containers, leave them in a sheltered spot over winter, and then transplant them directly into the garden or in new containers in spring.
Hardwood cuttings
When to take them
If you opt for taking hardwood cuttings, you should wait until winter and take your cuttings from mature stems. You want to do this when the plant is in dormancy.
How to propagate
- For this method take each cutting right after the leaves have dropped in the autumn or right before the buds burst open at the end of winter.
- Each cutting should be about 30cm in length. You want several though to improve your chances of success.
- Trim the top of the stem right above a leaf node, and remember to cut an angle so you can recall which end is the top.
- Trim the bottom of the cuttings straight across, right below the leaf node.
- In your garden, dig holes that are about 15cm deep. These can also be planted into pots like softwood cuttings if you prefer.
- Place the cuttings in the holes individually, angled with the end up, and backfill the holes with soil until the cuttings are held firmly in place.
- Check on the plants weekly to ensure they are properly watered.
- Rooting should take place after a few weeks and come spring, there should be healthy new growth so that you can transplant them elsewhere in your garden or into their permanent home.

Ground layering
When to take them
For this method, you want to take the cuttings in the middle of spring when the plant is full of energy and growth and is still pliable enough to situate as needed for the technique.
How to propagate
This method is simple, but effective, and allows the stems to remain attached to the main plant while developing new roots. You will need to, again, make sure the stems you choose are long and flexible enough to lay on the ground.
- For this, pick a shoot that is located on the outside edge of your Spiraea bush.
- Remove the leaves from it and gently scrape off the outer bark in a few key places.
- The rooting section should be small, no more than 12cm so that the roots are concentrated in one place.
- Dig a small trench below this shoot, about 2-3cm deep and 6cm long.
- Bend the shoot over the trench so that the stem lays in it.
- Use tent pins or clothes hangers to pin the scraped area in place, maintaining firm contact with the ground.
- Cover this section with soil and gently water on a regular basis.
- It should take between 6 and 8 weeks for new roots to form, at which point you can remove the stem from the main plant and transplant it to its final home.
Aftercare
Once you have successfully propagated your cuttings, be sure to care for them in such a way that your new Spiraea bushes have the best opportunity for growth.
Firstly, they do best when they are planted in full sun, with only light shade against the heat of the afternoon. If you haven’t yet transplanted them outside, then be sure to place them somewhere without shade. The shade will stunt their growth and severely inhibit the production of flowers, which, let’s face it, is a big part of their appeal.
They should also only be put in well-draining soil. If their roots stay wet, they won’t do as well either, and you leave your new Spiraea bushes susceptible to root rot.
After they have been transplanted, you won’t have to do much. You can help them grow more effectively by adding a layer of mulch around the plant to retain moisture. During the summer months, you can also water them a bit more regularly, contingent on the weather in your area, to produce better blooms. After those blooms have finished, be sure to prune away the spent sections of your plant.
If you have cultivated a new Spiraea bush that flowers in the spring, you can prune it immediately after the flowers are gone by removing any dead wood and trimming the canes down to the ground. If you have a summer-blooming Spiraea bush that you have successfully propagated you can prune it in the spring or in the winter.
Be on the lookout for aphids as well. If they do become a problem you can easily treat them by spraying them off with a stream of water, a mixture of water and liquid dish soap, or a pesticide spray.


