Last updated on February 19th, 2022
Our site is reader supported, this means we may earn a small commission from Amazon and other affiliates when you buy through links on our site.
If you are tired of heading outside every day to check on your plants and water them or you are simply are not always around to do it, one solution is to install an automatic watering system in your garden.
You can use multiple methods to install a simple system that either drips water regularly or alternatively uses a spray system to water a large area, for example, a lawn or a large flowerbed. You can purchase individual components based on what type of irrigation system you want, from soaking hoses that spiral around the base of plants in a flowerbed to watering drippers that can be placed into hanging baskets and planters.
What is an automatic watering system?
An automatic watering system is a series of supply pipes that connect to an outside tap and irrigate your garden. When you use the supply pipes with a water timer you can automatically water your flowerbeds, hanging baskets, plant containers and even greenhouses. This will be done on a regular basis at specific times of the day for set periods of time. Some cloud versions can even be controlled from your phone from anywhere in the world.
Benefits of automatic watering systems
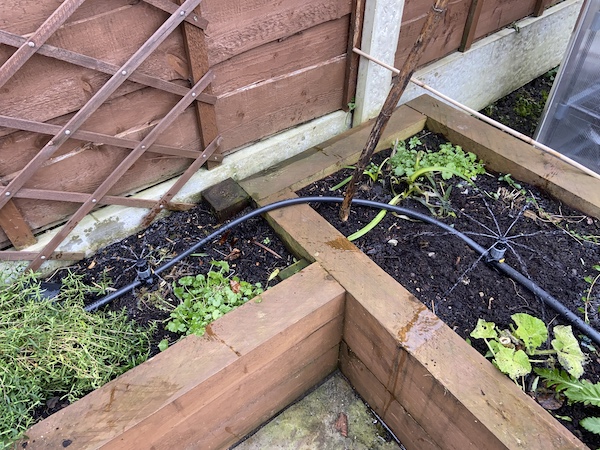
The use of automatic watering systems brings about the first benefit of time and effort saved. You can keep your plants healthy all year round using your water most efficiently without you being required to go out into your garden every day to water them.
This is particularly beneficial if you work long or irregular hours or if you plan to go on holiday. No matter what comes up you don’t need to worry about finding a friend or family member to stop by your house and water your plants.
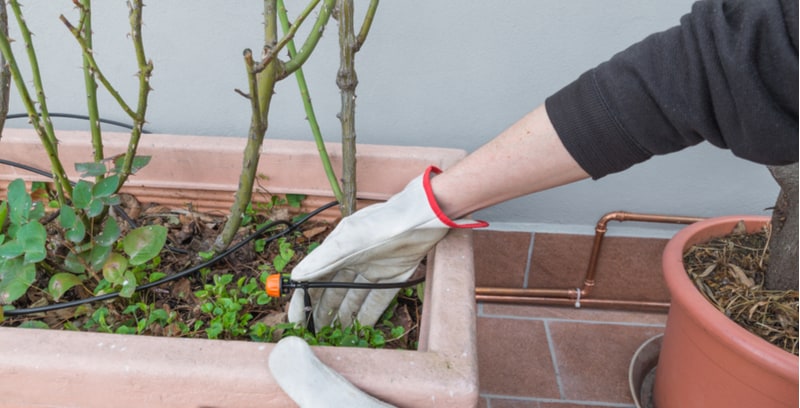
Moreover, using systems like drip emitters helps you achieve optimum water savings, upwards of 90% compared to a regular hose pipe and spray gun. Using a regular hose you get water dripping here and there as you turn it on, water that sprays out of the pots or containers splashes every which way or simply provides an inefficient amount of water during the day. With a timer, you can make sure you get water to your plants at the right time of day and in the correct amounts. This is done by watering slowly but for a longer period of time which will avoid wasting water because it won’t be running over the sides of pots etc.
What you will need to get started?
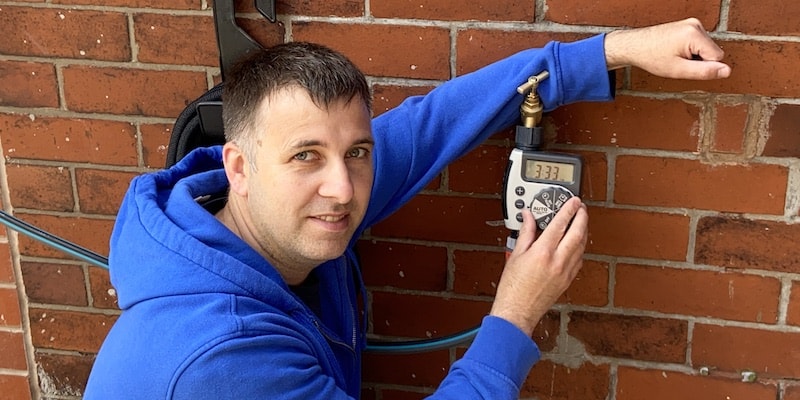
One of the first things you should consider is a water timer. An automatic water timer can be programmed to water when and how with preset programs. With some designs, it can be set on a weekly basis or using a single dial knob that turns to daily watering preset programs.
Programmable timers are typically screwed onto your outside tap and function with a battery that is designed to last an entire season. If you need to water out of turn you can find designs that have a manual override so that you aren’t limited to the preset programs.
Recommended water timer
No products found.
See my top recommended water timers to automate watering
Setting up a watering system
You will need a set of supply pipes to carry the water and this is where you get some leeway to be creative based on your space. The number of pipes and the thickness you will need is contingent upon the design you have in mind for your water highway.
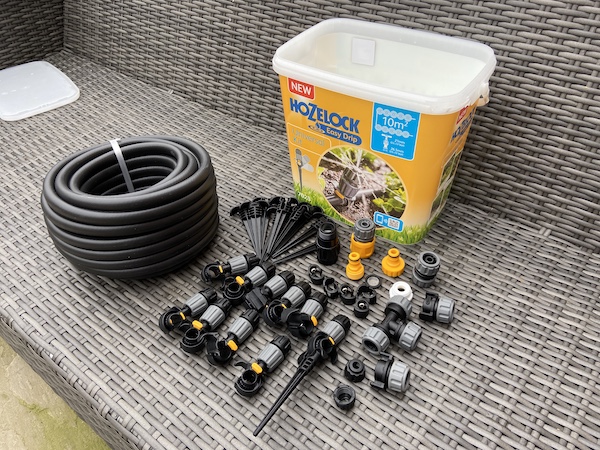
You want to start with a 13mm thick supply pipe that connects directly to your water source and from there you can use things like wall clips to secure it in place, joiners, elbows, or t-pieces to connect it to the smaller 4mm (thick) pipes that will deliver the water directly to your plants.
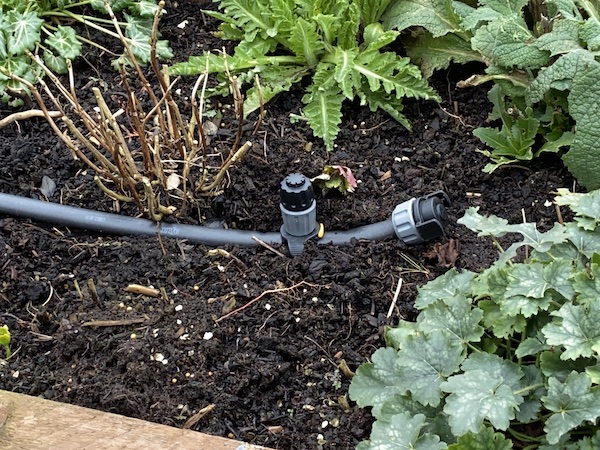
One essential item you shouldn’t forget is the end plugs to seal off the end of your water highway and they work very much like a dead end. A flow control valve that you can adjust or shut off completely to control the amount of water in your tubes is also important.
In some cases, you may just need the 13mm main pipe, connecting this to a soaker hose that has been spiralled around the flowerbed, or insert sprayers directly into the 13mm pipe.
Some setups also just use micro piping and not the 13mm piping so there are plenty of choices. This is usually a good setup for using on your hanging baskets because running a 13mm pipe up your walls towards your hanging baskets might become a bit of an eyesore.
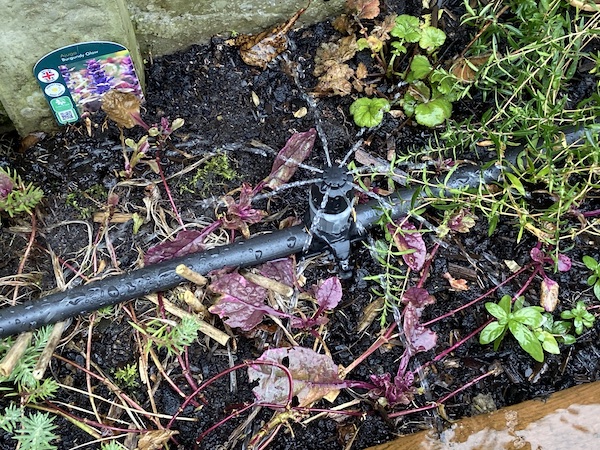
The final touches include the drippers, the mini sprinklers or the micro Jets and these are the components that deliver the water in the final stage. Drippers are often reserved for the base of plants and you can adjust them to cover several plants if you have them grouped together. These release water much more slowly, giving you more precision and control over watering and they are more efficient compared to other emitters.
Micro jets spray a fine mist over a larger area and they are cost-effective and quick to install. If you have hanging baskets and containers then you will probably need to use the 4mm micro pipe with drippers attached on a spike to insert them into the hanging baskets and pots.
My top recommended starter kits to get you up and running
- Complete watering kit providing a great solution to watering borders, hedges and vegetable gardens for an area up to 10m²
- Easy to Install in just 15 minutes, due to ‘Push Fit’ design
- Combine with any water controller for Automatic Watering
- Modular in design so kits can be easily connected together to make a larger system
- Delivers more controlled watering directly to the roots reducing water wastage through evaporation or inaccurate watering
- Complete watering kit providing a great solution to watering your pots, containers and hanging baskets (each kit can water up to 15 containers)
- Easy to Install in just 15 minutes, due to ‘Push Fit’ design
- Combine with any water controller for Automatic Watering
- Modular in design so kits can be easily connected together to make a larger system
- Delivers more controlled watering directly to the roots reducing water wastage through evaporation or inaccurate watering
How to make an automatic water system step by step
When designing an automatic watering system there are three simple things you need to do.
1. Find a connection to a water source
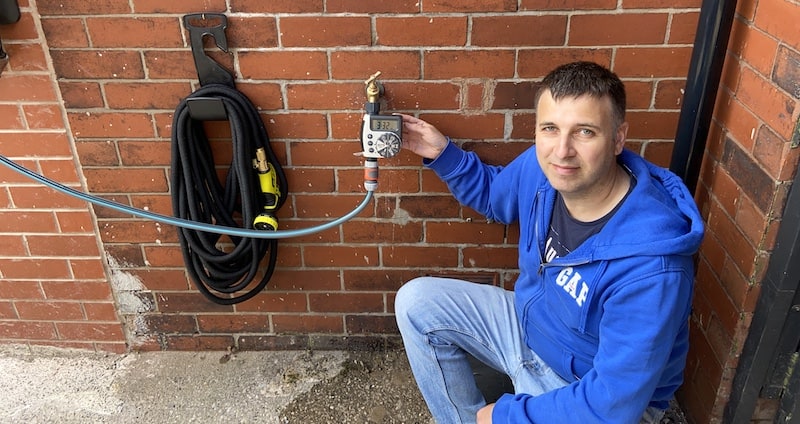
Find a connection to a water source, usually an outdoor tap. From your water source, you can also put in a water timer to automatically regulate the watering. You should invest in a pressure reducer if you have high water pressure in your tap because high water pressure gets inconsistently released and can cause the different parts of your system to become loose.
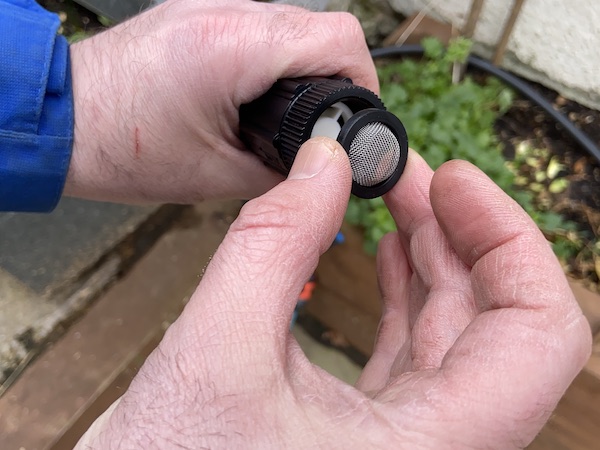
The good news is that most automatic watering sets come with a pressure reducer. Again, if you are using a water timer it should be connected directly to your source.
See our recommended smart watering timers
See our recommended standard water timers
2. Create your supply pipelines
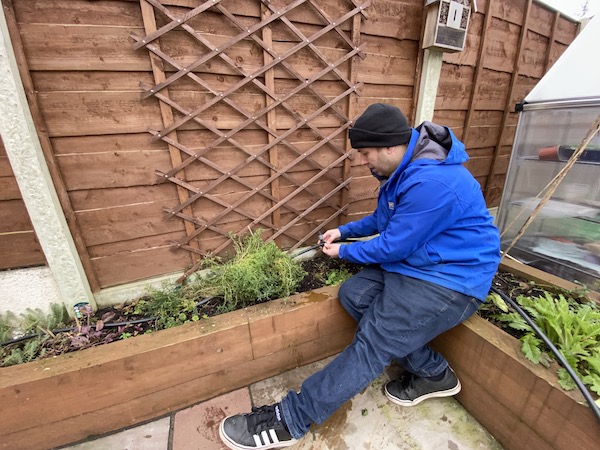
Once you have installed the initial part of the system you need to build a network of supply pipes, like a pipeline. You should plan out the route of your supply pipes before you purchase anything. This will prevent you from buying parts you aren’t going to use and also ensure you have everything you need before you begin. You can choose from pipes that are 4mm micro piping, 13mm in thickness, or use a combination of both.
3. Putting the final pieces together
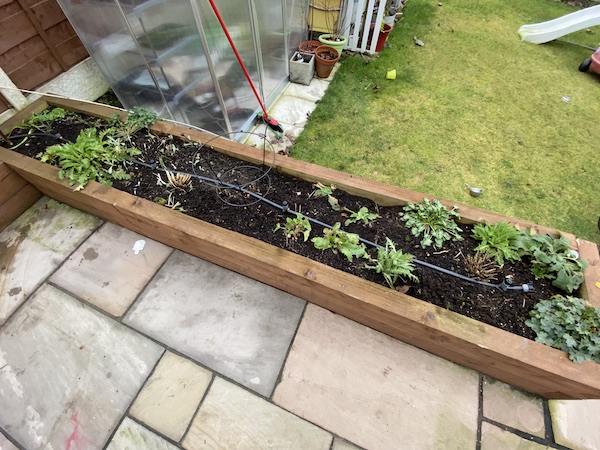
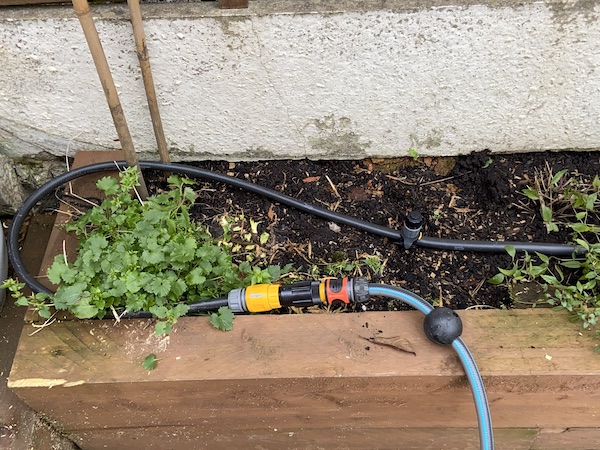
The final step after you have your network or highway of supply pipes is to fit it with emitters. Emitters come in many forms, including drippers, mini sprinklers, or micro jets. You can use a combination of these or if you have a personal preference stick with that one.
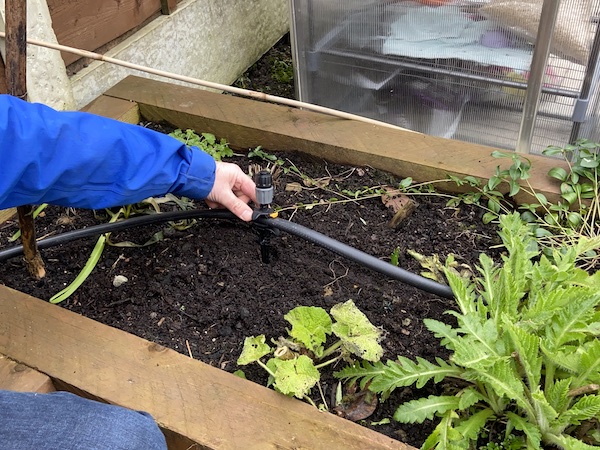
Drippers and sprinklers should be put close to the roots and in the shade so that your plants absorb more water with a lower level of evaporation. The number of drippers or sprinklers you need is again based on your design and the size of your garden.
The whole kit and caboodle
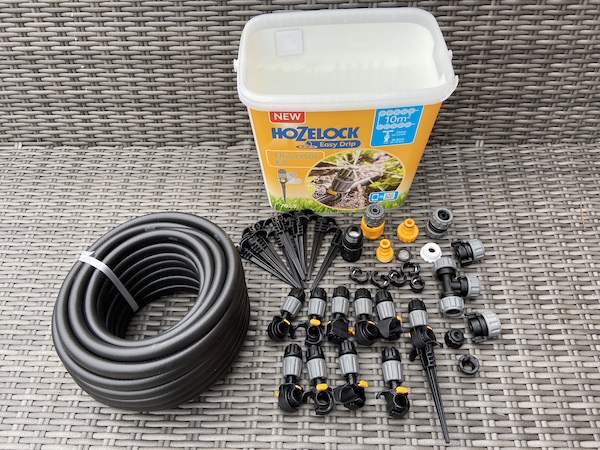
If putting together all of these measurements seems a bit too much for you and your garden is relatively standard in its shape or size, you can always invest in an automatic watering kit that comes with everything you need to set up your own irrigation system and automatically water your garden.
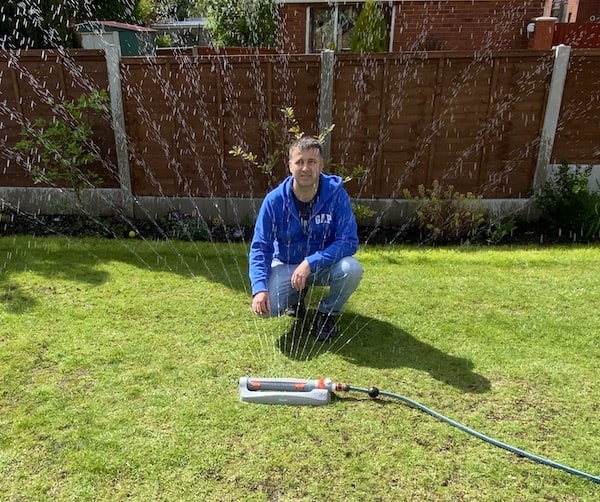
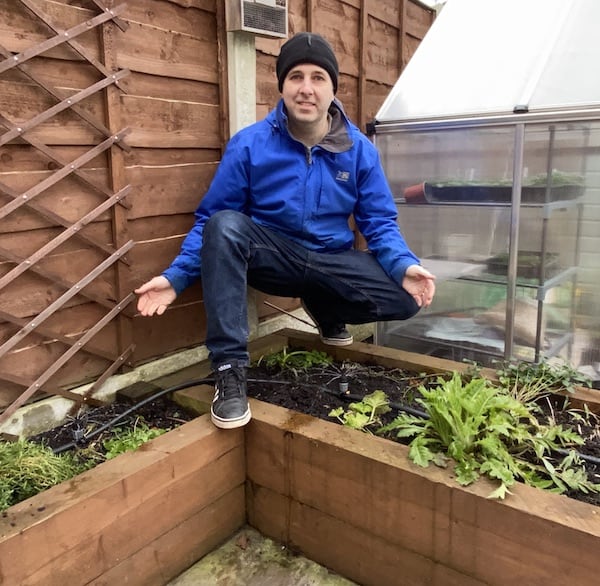
I showed some of my recommended starter kits earlier in this guide, however, the kit I have recently installed (and as shown in this article) is the Hozelock watering system for beds and borders.
- Complete watering kit providing a great solution to watering borders, hedges and vegetable gardens for an area up to 10m²
- Easy to Install in just 15 minutes, due to ‘Push Fit’ design
- Combine with any water controller for Automatic Watering
- Modular in design so kits can be easily connected together to make a larger system
- Delivers more controlled watering directly to the roots reducing water wastage through evaporation or inaccurate watering
Design Your Plan
As previously mentioned you want to design your water highway before you head out to start buying pieces. You can sketch the general area where you plan to build your system and take note of the dimensions and measurements. Measure and mark in meters and centimetres things like:
- Your fixed elements, your house and your outside tap.
- The distance from your outside tap to where you want your system to start.
- The length of the flowerbeds, fences or walls against which your supply tubes will run.
- The planting areas and containers where the watering needs to take place.
- Any obstacles like a walking path, bench or tree.
Draw your pipework as you want it, including where you have angles and will need joints to connect your supply tubes. If you have a supply tube that is going to be longer than 50 meters you will need two timers and flow control valves so you can water one area at a time because the water pressure may be too low to work efficiently.
Calculating the flow rate
You can do some quick math to determine the capacity of your system by turning your tap on as high as it will go, filling a bucket and timing the number of seconds it takes to fill your bucket. Multiply the number of litres contained in your bucket by 3600, then divide by the seconds it took to fill. The figure you get as a result is called your maximum flow rate per hour.
Want to know more? Learn how to set up an automatic drip system in this guide here.
Last update on 2026-01-09 / Affiliate links / Images from Amazon Product Advertising API

![HOZELOCK - Universal Irrigation Kit : Ideal for Watering Borders, Flowerbeds and Vegetable Gardens, Easydrip Universal Drippers/sprinklers, Supplied with 15m of Ø 13mm Hose [7023 0000]](https://m.media-amazon.com/images/I/51FcorBqHBL._SL160_.jpg)
![HOZELOCK - Micro Irrigation Kit 'Micro Kit' : Ideal for Watering Potted Plants and Hanging Baskets, Easy to Use, Supplied with 15m of Ø 4mm Hose and 15 Drippers for Precise Watering [7024 0000]](https://m.media-amazon.com/images/I/51B2c5GP-YL._SL160_.jpg)
